As we come to end of this class,
I would like to reflect on all the great edtech tools that I have used in this
class! Throughout the past few months I have highlighted different edtech
tools! The tools that were the most exciting to use were the screencasts such
as animoto to make a book trailer that was so much fun and it put a new twist
on book reports!!! Think about all the fun students could have fun making book
trailers! I also enjoyed making a podcast because I have come slightly obsessed
with them. I listen to many different types and they are great!
The comic strip edtech
tools were the most difficult for me to use. They took a lot of time and I had
to play with them a while to figure out. Overall, I think all the edtech tools
will benefit students because they are engaging and allow student to use technology
to facilitate their own learning! That is the key we just don’t want students to
memorize content we want students to ownership of their learning and create meaningful
content. I used the Book Creator to make my presentation of my final reflection for this course. I;m excited for my future as a libaraian and to use all these exciting edtech tools that I have learned and used through out this course! https://read.bookcreator.com/7J7JlB6m26PdmtvSLazvRZJzt9c2/wp6SoEYpRZSm4MuDoXYnSw
RSS = Rich
Site Summary or Real Simple Syndication. An RSS “feed” is a way for you to
subscribe to an internet site. News, blogs, audio and video sites use RSS feeds
to alert readers (or listeners) that there is new content on their site. Every blog has an RSS feed–you can find it at
http://YOURBLOGNAME.com/feed/ To add a blog to a reader, the only thing you
actually need is a URL. This means that the RSS icon on your blog can point to
your feed URL or your favorite reader. Adding an icon that points to your
favorite reader isn’t excluding the people who use other readers. They can add
your blog URL to their preferred reader.
What are some Feed Reader I can use in the Library?
Bloglovin
It allows readers to easily follow
along with your posts. Think Instagram... for blogging. Your Bloglovin'
followers can keep up with each of your latest posts in their feed (unlike
Facebook which sorts posts by popularity). Each time you write a new post,
Bloglovin' automatically displays a preview in your followers' feed. Followers
can click on the post to read it or they can 'like' it and save it for
later. Followers can also click on your blog and see all of your posts at
a glance, just like they can with your Instagram account. It’s easy
to use and a familiar format for students. I chose to use Bloglovin due to the format and how its ease of use. It can also be downloaded as an app to use in student mobile devices.
Feedly
What really helps make
Feedly more than just an RSS feed aggregator is its organization system and
site finding tools. You can create a Collection for a given topic. That’s fine
on its own. But Feedly then recommends other related sites based on their
content. That way you can always be discovering new sources of information and great
articles that you may have completely missed out on before. Feedly makes it
very easy to tell how long ago an article was posted, the author, and even how
many times it’s been shared.
5 Blogs to Follow
The Library Patch
The Library Patch is a blog created by school librarian
Sonya Dykeman. Her blog features all the cool and
exciting things that happen in her library every day. Her post includes different
lessons, technology, books, and activities that she does with her students.
Tiffany Whitehead, the Mighty Little Librarian, is
an obsessive reader, social media user, and technology geek. She is the
Director of Library at Episcopal High School in Baton Rouge, Louisiana. She has served as the President for ISTE’s Librarians Network and
was recognized as one of ISTE’s 2014 Emerging Leaders. Tiffany is National
Board Certified in Library Media and was named one of the 2014 Library
Journal Movers & Shakers.
The Incredibly True Adventures of an EDTech
Trailblazer
Nikki is a veteran educator and a retired Librarian/Instructional
Technology Facilitator and ISTE Librarians Network President, Nikki is passionate
about 1:1 Digital Initiatives. Her blog highlights all things ED Tech!
Ms. Jones is a leader of Education Technology. Her work
and writings have been features in the New York Times, NEA Today Magazine. Her
blog features technology, book reviews, book list, and presentations that she
has given all over the USA.
Podcasts give students an opportunity to learn
information in other ways besides just reading. Students should be experiencing
various forms of media such as reading, watching videos or TV and listening to
the radio or podcasts. Podcasts,
particularly ones that tell a story, engage young people in unique ways.
What Tech Tools can I use to Create Podcast?
Audioboom
Is a tech tool used for accessing and creating podcasts.
Students can create their own podcasts. Students can also search a host of
resources from media and educational outlets. Students and teachers can create free
accounts.
Podbean
Is a tech tool used to create podcast. It is user-friendly
and offers free and premium plans. It allows the user to upload to podcasts
apps like Google and iTunes. It also has beginner-friendly set up that takes
you step by step. It also has tutorials that the user can view to help create
podcasts. It also creates a page that host the podcast and is interactive for viewers
to leave comments. This is a great site to create a class podcast webpage to
share students podcast with peer, parents, and the community.
Anchor
Is a tech tool that allows educators and students to
use their smart phone to create, download and post podcast. This tech tool is readily
available. Majority of students have phones and many schools are BYOD (Bring
your own device). The app allows the user to instantly create, edit, and
publish their podcast. It also allows the user to upload directly to Twitter
and Facebook. The feature that I think
is the most efficient it allows you to upload music from iTunes or Spotify to
use on your podcast. Below is an example of the podcast created using the web
app Anchor.
What are some Educator Podcast I should be Listening
to?
Podcast are available on all different streaming platforms
such as iTunes, Spotify, Pandora, and Google Play. Below are some links to
podcast that all educators and students should be listening too!
Comic strips and cartoons are two engaging
instructional tools to use in the library with all different grade levels. They
are effective because they engage students in meaningful learning experiences.
Students can own their learning of key skills such reading, writing, speaking
and communicating. They are extremely effective for ELL students who can use pictures
to effectively communicate their knowledge of content.
Why should I use Cartoons and Comics in the
Library?
Comics are fun, interesting and motivating.
Comics promote a wide variety of skills: cognitive,
intellectual, social, and cultural.
Can be used to teach different school subjects.
Can help students develop higher-order thinking skills
(sequencing, predicting, inferring, synthesizing, analyzing, evaluating...etc).
Enhance students engagement with multimodal texts.
Make students aware of the multimodal means through which
meanings are constructed and communicated.
Ideal teaching tools for teaching a target language
Visually illustrated content is much easier to process,
understand and remember.
Can be used to teach reading, writing, listening, and speaking
skills.
What are some ways I can use Cartoons and Comics
in the Library?
Digital storytelling: students (in small groups or individually)
create a narrative storyline and illustrate it with relevant graphics.
Students use comic strips to visually retell a read aloud read
in the library.
Provide students with blanked out comic strip and ask them to
write a story based on the illustrated characters. (writing activity, promote
predicting skills)
Use comic strips to raise students awareness to topics such as
racism, bullying, digital citizenship…etc.
Use comics to improve students speaking skills by asking them to
act out comics they created. Alternatively you can engage students in oral
discussions about the content of the comics.
Tools to create Comics and Cartoons in the
Library
Pixton
Is a web based application that can be used by educators
and students. You can create a class for each class or grade level that comes
to the library to make comics. It is easy to use, and you can buy different packages
for students to use.
Below is the comic strip I created using Pixton
The comic was easy to create. It allowed me to download
the comic and it was easy to save. Students would find it easy to use. The con
is the you have to purchase more of the images to use to create the comics.
Students can learn a
great deal just by watching technology in the
classroom videos and learning
from the thoughts, experiences, and demonstrations of others. In fact, they
already are. Students are naturally watching videos that are interesting and
relevant.
·Flipped
Instruction. - this allows the students to become the teacher or making the
classroom content available anywhere. With YouTube you can assign students to watch
a video before coming to the library. Students can use as a resource to learn
class content. Do you want to give students a resource they could use to learn
outside of the class? Find (or create your own) videos on YouTube that address
the material you need and give the links to your students.
·Supplemental
Information. – a librarian can give students extra information that you
don’t have class time to commit to. Share the interesting links with students.
Students could benefit from some additional video resources to help them when
they’re working outside of class.
·Self-Directed
Learning- a librarian can take curriculum content and direct students to
YouTube as a resource to find the information interesting and relevant to them.
You can assign students a self-directed project or have an or have an
individual passion they want to explore, encourage them to take advantage of
YouTube.
·Classroom
Enhancers. Videos can illustrate ideas and engage students far more
substantially than textbooks, lectures, pictures, or other activities. When
possible, turn to this free resource for building more effective lessons during
class time.
Examples of Librarians videos on YouTube
Below are YouTube videos that librarians have posted
that would be most helpful for students.
Librarian Calypso Gilstrap made a video to show
students how to use online database EBSCOHOST
This librarian shows students how to Soundzaband a resource
that allows students to access royalty free music.
The librarian of Pikesville High School Library posts several videos of teachers discussing AP courses. Students who are considering taking these courses can view videos to seek more information about the courses.
The
librarian shows students how to use online cite generator Noodle Tools. The
video shows students how to make a book citation importing the ISBN information.
Below are examples of videos that students would like
best.
This is a video of a student project. It is a great
creative example of how to allow students to own their learning of curriculum
content.
This video highlights the Pikesville High School
students in their school library. It shows students engaged in the activities
of the school library.
This is a student created video about overdue library books.
It’s a great assignment to review the policy and procedures videos. The librarian
can show this at the beginning of the school year.
Students will like this video as a reference tool.
Animoto
Animoto is a Web 2.0 tool that
allows users to produce videos that blend photos, video clips, text and
music. Examine your existing curriculum to decide where the use of
Animoto will support your learning objectives. For example, Animoto could be
used for the following ideas:
·At the start of the school year, students
could use Animoto to introduce themselves or their classmates.
·Students can illustrate their own poetry
using digital images they find on Internet or ones they take.
·Animoto can be used to present research
information to the class.
·Students could illustrate step-by-step
instructions for procedure writing.
·Send students on a scavenger hunt,
supplied with digital cameras. Have students assemble their digital
images into an Animoto video to display what they found.
·Students can use Animoto to create a book
trailer.
What
is a QR Code?
A QR Code is very similar to a bar
code. QR stands for Quick Response. The image consists of square
dots in a unique configuration that provides information for the user.
QR Codes can contain text, links (to
web sites, videos, files), and much more. QR Codes are safe to use in the
classroom, so there’s no worry about leading your students astray.
Students only access what you tell them to via the QR Code.
Why should a librarian
use QR Codes in the library?
The main reason is
that it’s easy to give students web addresses and allows them to be more
independent. It allows the librarian to automate and release responsibility to
the students. QR Codes reduce frustration
of typing in a web address. QR codes are
fun for students to use!
Ways I can use QR
codes in the library?
There are many ways
to incorporate QR codes in the library. They are fun, easy to use and
create! Below are a few examples:
A Scavenger Hunt
Create a scavenger
hunt of the different genre sections of the library. Get the
students up and moving by creating a scavenger hunt. Place questions around the
room, or better yet, around the school. Add possible answers to the questions
and accompany each answer choice with a QR code that sends
students to a new location. Only the correct answer will send them to a new
question. Incorrect answers offer a hint and send them back to the question
they missed.
Simplify
Research Projects
Provide quick and easy links to articles, videos, web sites, or
podcasts that you want your students to be able to access.
Provide
Support to Struggling Readers
Make audio recordings of material you need students to read and
upload the recordings to your Google Drive or Dropbox. Link
a QR code to the web address for the file and have
the QR codes available for students who need a little extra help
when reading content area material.
New
Take on Book Reports
Make video or audio recordings of students reviewing a library
book. Link the recording to a QR code and attach it to the spine of the book.
Students will be eager to check out what their friends think about books in the
library.
Below
is an example of a book trailer I created using Animoto for the fiction young
adult book Children of Blood and Bone by author Tomi Adeyemi. It is a #1 NY Times Bestseller, has receied numerous awards! It was my favorite book of 2018!
Zélie Adebola remembers when the soil of Orïsha hummed with
magic. Burners ignited flames, Tiders beckoned waves, and Zélie’s Reaper mother
summoned forth souls.
But everything changed the night magic disappeared. Under the
orders of a ruthless king, maji were killed, leaving Zélie without a mother and
her people without hope.
Now Zélie has one chance to bring back magic and strike
against the monarchy. With the help of a rogue princess, Zélie must outwit and
outrun the crown prince, who is hell-bent on eradicating magic for good.
Danger lurks in Orïsha, where snow leoponaires prowl and
vengeful spirits wait in the waters. Yet the greatest danger may be Zélie
herself as she struggles to control her powers and her growing feelings for an
enemy.
I created a QR code
to view the book trailer below
A screencast is a video
recording of what’s happening on your computer monitor, often with annotations
and/or narration. Screencasting is a capture of all of the action on a on a
computer screen while you are narrating. So it’s the new school version of
power point!! As with anything it can be very simple such as a slide
share presentation or as advanced as a movie-like video.
Why do I
need to use Screencasting in the classroom?
Engaging students and equipping the, to be creative thinkers, student
must have an opportunity to own their learning. With the inclusion of
technology students can do that. Screencasts are a great way for both students
and teachers to share the required steps in completing a math problem,
collaborate on close reading, or pursue any other literacy activity. It also allows teachers to deliver content in a meaningful and useful
way. Think about how many times students need to refer or unpack the content
that was delivered during instruction time. Thorough a screencast a teacher can
do example math problems, review instructions for a project or assignment.
Screencast-o-Matic
Screencast-O-Matic is a screen-capture service that has a highly
functional free version, and a powerful and easy subscription plan that doesn’t
break the bank. If you use, or wish to use, screen capture technology. You can
record your screen, yourself, or both, and alternate between cameras. With
subscription you gain access to point-and-click editing tools that are simply
easy to use.It is also compatible with Chromebook, Windows, MAC and iOS. Some of the
pro’s of this tool is that it only takes about 15 minutes to record and upload
videos and it is great for homework, individual, and knowledge gain.
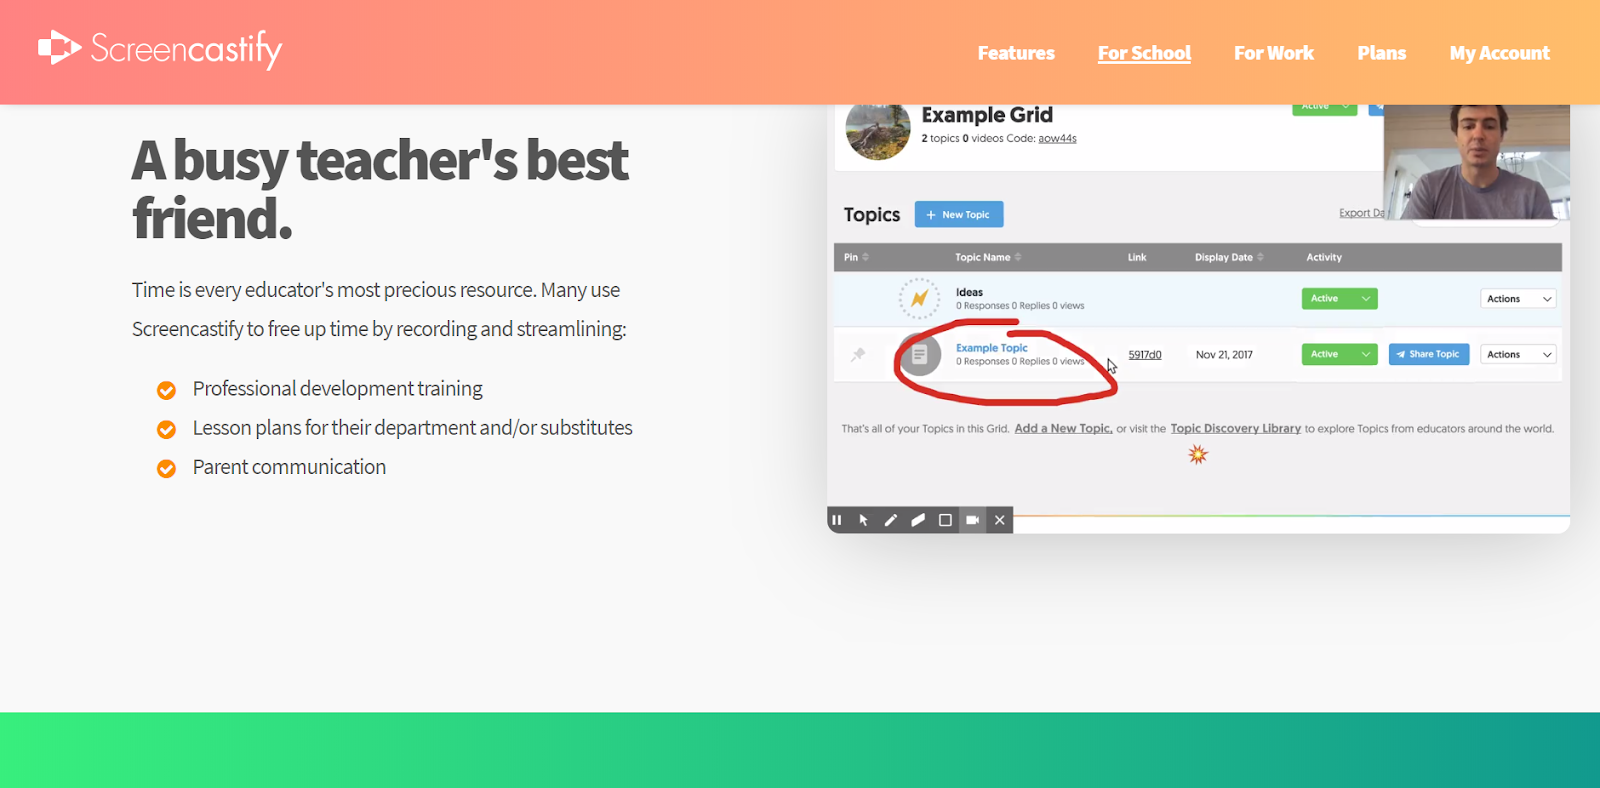
Screencastify
Screencastify
is a free Chrome browser extension that records your screen, face, voice, and
more. To use Screencastify, find its icon in the Chrome toolbar and
choose among the recording options: record a single tab in your web browser,
capture all screen activity, or use your webcam to record or insert a video of
yourself. It allows the teacher or student to save completed videos locally in
you Screencastify account or in Google Drive, or upload them to YouTube. The
free version allows up to 50 recording per month, each about 10 minutes long.
Chromebook’s
are very popular in classrooms and schools and it is completely compatible with
Chromebook. It can only be used with Chrome browsers. Screecastify captures
video and audio within tables. Find the application icon on your browser
toolbar and click record to easily record presentations, tutorials, and more.
The pros of this tool is that its Google Classroom and suite is very popular
among teachers and students. Teachers and students can use Screencastify to show
hot use the comment feature in Word for annotating class notes and reading passages.
Students can make how-to demos for instructions on using and navigating your
class home page, class wiki or blog, or other application you wish the students
to use in creating their own projects.
For my screencast example I chose to use Screencastify.
I chose this because my school district has implemented google classroom and Chromebook
throughout the district. Many classrooms are now 2:! with Chromebook in grade 3-5th.
Every middle schooler and higher
schooler can check out a Chromebook with parent permission. It was very user friendly
and completely adaptable with Google and that is the main reason for using it.
It uploads and saves directly to Google Drive. This makes it user friendly for uploading
and sharing the screencast with colleagues, parents, and students. Below is my screencast giving parents and students a
tutorial of the Heflin School Library webpage.
Infographics
are a visual representation of data. When students create infographics, they
are using information, visual, and technology literacies. They can include numbers, text, images, or any
combination of the three. It is another tool for students to create a visual of
information that they have learned. It’s a digital display of knowledge and
research.
Why do I
need to use Infographics in the classroom?
Using Infographics in the classroom allows the use of
technology to engage learners. A teacher can assign the analysis of infographics as a close reading assignment
can be one method for engaging students in coursework that can be rigorous,
relevant, and fun. Infographics allows students to communicate information that
they are learning, and it will help students understand and apply the content
that they are learning. All of these skills are essential for the 21st
century learner.
Easelly
It is a web based application that allows students and
teachers to make infographics. You can make
a free account to use the application. It allows teachers to have access to the
upgraded version for only $4.00 monthly which is reasonable. It has over 1.1
million illustrations and images, printable and high-quality version. It allows
you to create student accounts. When exploring the application it was user friendly
and had existing templates based on categories such as reports and checklist.
The cons of this application are the limited number of templates for the free
version. It also didn’t have a variety of charts and graphs for the user to
pick from.
Infogram
It is a web-based application that allows students and
teachers to make infographics. It also can
make a free account or purchase an upgraded account. It allows the user to make
a free account and choose from certain templates. It also has a membership
option. I feel that Infogram is marketed more towards business who need to save
money on a graphic designer. It works best for those who have some experience
with making an infographic. There weren’t any tutorials on how to design or use
the interface. A user must explore and learn the interface before one can use
it.
Piktochart
It is a web-based application that allows students and
teachers to make infographics. It also can
make a free account or purchase an upgraded account. Piktochart starts the
process by asking certain design question too to find different templates for
the user. The application also allows the user to make an infographic, digital
presentation, poster, reports and fliers. The pros to this application are it
has serval tutorials through out the application to make it easy for even the
most novice of users. It walks you step-by-step to build your infographic. It
also has the most templates in the education category of the three applications
reviewed. I chose to make infographics using Piktochart because of the user
tutorials being this was the first time I have ever made one. It had so many
tutorials and tools that made it user friendly and not overwhelming. The
template was easy to navigate and make it my own.
Example Infographic
Loading...
References
Children, libraries, and reading. (2013, May 16). Retrieved from https://www.pewinternet.org/2013/05/16/children-libraries-and-reading/
Lawrence, A. (2015, May 29). The Whats Whys and Hows of Infographic Assignments. Retrieved June 29, 2019, from http://at.blogs.wm.edu/infographics-as-alternatives-to-traditional-writing-assignments-what-why-and-how/
Rainie, L. (2013, May 1). Parents, Children, Libraries, and Reading. Retrieved July 1, 2019, from https://www.pewinternet.org/2013/05/01/parents-children-libraries-and-reading/
Schrock, K. (2010, October 16). Infographics. Retrieved June 27, 2019, from https://www.schrockguide.net/infographics-as-an-assessment.html
Schulten, K. (2010, August 27). Teaching With Infographics | A Student Project Model. Retrieved July 1, 2019, from https://learning.blogs.nytimes.com/2010/08/27/teaching-with-infographics-a-student-project-model/